Putting it all together
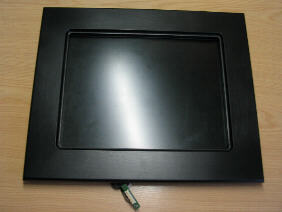 Once the basics for this project were done, the rest was fairly straight-forward. The screen already was attached to the frame, and the laptop could be fitted on it's back.
To secure the laptop itself, I needed to search for a while: later on I still needed to be able to access the DVD player, as well as the floppy drive. The power button needed to remain accessible, as well as the ethernet socket and the controls for sound and volume. Other connectors were less important, but it would be nice if they could remain accessible as well.
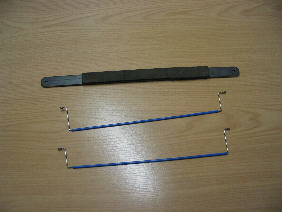 In the end I went with the following solution: two metal hooks which were to be bent around the laptop (as pictured), with two rings on each end so they could be secured to the frame with some screw. The hooks itself were insulated with the sheath of a piece of electrical wire, to be sure they would never come into contact with other loose parts or cables from the laptop (should anything come loose over time). The picture also shows a closeup of the metal bar that was used to press down on the screen. You can see the little foam/rubber blocks which touch the screen, and make sure it cannot be damaged with the metal bar in place.
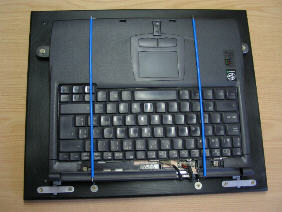 In this picture you can see the result. Why did I decide to keep the keyboard connected and in place? Well, why not? Those bent hooks never make contact with the keyboard, only with the case. Besides, the bottom of the keyboard is a metal plate which touches the cooling parts of the processor, thus forming an extra area of cooling. Above all that, it even works (well, half of it does), so in an emergency I can still use it for whatever purpose. It also keeps dust out of the case, and it looks a bit better than an opened laptop.
On the other hand, the little bar carrying those additional function keys was not saved - not really out of free choice, but because the plastic clips didn't make it through one of my attempts to take out the keyboard. Alas.
Next page: Choosing an OS »